Scripted Screenshots

I recently needed to make a screenshot of an entire web page, i.e. not just the part the fits on the screen (or in the viewport), but the whole thing from top to bottom.

Somehow I missed the possibility that there might be a zillion browser extensions for just this purpose. From writing features (acceptance tests) with Cucumber I’m familiar with PhantomJS, a “headless”, scriptable browser based on WebKit.

Here’s how it works:

$ webshot --help
Usage: webshot [OPTIONS]... URL IMAGE_FILE

Options:
          -j|--jquery           Inject jQuery into the page.
         +-e|--exec «value»     Execute script in page context.
         +-f|--file «value»     Execute script file in page context.
          -v|--viewport «value» Viewport size WxH; default 1280x800.

          (* mandatory option)
          (+ repeatable option)

Luckily, I didn’t have to write the commandline parsing myself. But it was fun to figure out how Deferreds might be implemented.

Collecting DOM events

The DOM change notification I presented yesterday is one piece in the puzzle to rejuvenate my languishing JavaScript form validator. I’ve not yet made up my mind on a lot of issues, but there’s one thing that’s certain: the next version will have to be able to work with changing forms, that is, forms that show different input elements depending on already chosen values.

Since yesterday, I have a way to be notified when the DOM has changed. As it is, the dom:changed custom event is completely general and not quite what I need. Of course, I do need some kind of notification, but what I get when a function changes the DOM in several places, is a barrage of dom:changed events. I don’t want to do lots of stuff for each of these events, but I’ve got to do something about the events collectively. There is no natural bracketing for events, there’s nothing that says which events belong to the same high-level change. But that’s not really necessary, rather, it is good enough to collect all relevant events that occur in period of time.

Here’s a class that collects all events that it receives over a given interval (of seconds) and passes them on to a handler function.

Element.EventCollector = Class.create({
  initialize: function(handler, interval) {
    this.handler = handler;
    this.interval = (interval || 1) * 1000;
    this.reset();
    this.dischargeEvents = this.discharge.bind(this);
  },
  reset: function() {
    this.events = [];
    this.timer = null;
  },
  observer: function() {
    return this.onEvent.bindAsEventListener(this);
  },
  onEvent: function(event) {
    this.events.push(event);
    this.wait();
  },
  wait: function() {
    if (!this.timer) {
      this.timer = setTimeout(this.dischargeEvents, this.interval);
    }
  },
  discharge: function() {
    this.timer = null;
    var events = this.events;
    this.reset();
    this.handler(events);
  }
});

Add some syntactic sugar, so that we can do things like

document.body.collectEvents('dom:changed', function(events) { ... });

Element.addMethods({
  collectEvents: function(element, eventName, handler, interval) {
    var collector = new Element.EventCollector(handler, interval);
    $(element).observe(eventName, collector.observer());
  }
});

For my motivating case of the validator that’s still not exactly what I need. I can arrange to get a notification that a whole bunch of elements was changed, but I don’t want to deal with these elements individually. The validator I have (and the next version I envision) works it’s way down from a starting element and attaches its magic pixie dust to everything below. Thus, what I need is a common ancestor element for all the changed elements. The idea is easy: Go down from the root of the “family” (document) tree and follow it until the path to the elements branches.

Element.addMethods({
  commonAncestor: function() {
    var ancestorsLists = $A(arguments).map(function(el) {
      el = $(el);
      var ancestors = el.ancestors().reverse()
      ancestors.push(el);
      return ancestors;
    });
    var common = document;
    Enumerable.zip.apply(ancestorsLists.shift(), ancestorsLists).each(
      function(ancestorTuple) {
        var cand = ancestorTuple.shift();
        if (!ancestorTuple.all(function(el) { return el == cand; })) {
          throw $break;
        }
        common = cand;
      });
    return common;
  }
});

[See Element#ancestors, Enumerable#zip, $break.]

Finally, here’s an example that puts the existing pieces together.

document.observe('dom:loaded', function() {
  document.body.collectEvents('dom:changed', function(events) {
    var affectedElements = events.invoke('element');
    var ancestor = Element.commonAncestor.apply(null, affectedElements);
    console.log('dom:changed below: ', ancestor);
  }, 10);
});

The DOMs they are a-changin’

So we’ve put in the effort to make our JavaScript code nicely unobtrusive and all is well — until it isn’t. A pesky Ajax request has messed up the DOM and suddenly there are elements in there where our unobtrusive behavioral goodness has not been attached. Never give up, never surrender. You won’t even have to get out Grabthar’s hammer, it’s only just a small matter of programming.

First, let’s shrink the problem a little. Let’s concentrate on changes effected through the abstraction layer provided by the Prototype library. Prototype implements several DOM-changing functions on the Element singleton and also mixes them into extended DOM elements. These functions are remove, update, replace, insert, wrap, and empty. Prototype also gives us the wrap function that wraps a function around another, somewhat akin to AOP‘s around advice, but without pointcuts.

Now the strategy is clear: Replace the original DOM-changing functions with versions that record a bit of information about these changes. A good mechanism to serve the actual notification is to use Custom Events. Then, anyone intersted in changes to a branch of the DOM can register as an observer for our new dom:changed event.

However, it is a good idea not to fire the event straightaway after the DOM has been changed. We might be in the middle of a batch of changes and the DOM in a correspondingly unorderly state. Besides, it is sometimes necessary to give the browser’s rendering engine a bit of breathing room after changes. For all this, at first the event data is appended to a list and a timer is set to dispatch the corresponding events some time later. This timer is reset for every change, so that for a batch of changes it only executes once and and then fires all events successively.

To understand the resulting behavior, it is important to know that JavaScript is single-threaded. As a result, when a timer times out, it does not interrupt the currently executing code. Rather, the function attached to the timer is scheduled to be executed as soon as there is nothing else to do. Therefore, the usual sequence is like this

  • An event triggers a DOM-changing function
    • Change the DOM
    • Remember the change
    • Change the DOM
    • Remember the change
  • Fire events for all remembered changes

Finally, here’s the code.

(function() {
  var methods = ['remove', 'update', 'replace', 'insert', 'wrap', 'empty'];
  var changes = [];
  var timeout;
  
  function rememberChange(element, method) {
    changes.push({
      element: $(element),
      parent: element.parentNode,
      operation: method
    });
  }
  
  function scheduleEvent() {
    if (timeout) {
      clearTimeout(timeout);
    }
    timeout = setTimeout(fireEvent, 10);
  }
  
  function fireEvent() {
    changes.each(function(change) {
      var affectedNode = change.element;
      var operation = change.operation;
      if (!change.parent || 
          (change.parent && !affectedNode.descendantOf(change.parent))) {
        affectedNode = change.parent || affectedNode.parentNode;
        operation += 'Child';
      }
      affectedNode.fire('dom:changed', {operation: operation});
    });
    changes = [];
  }

  methods.each(function(m) {
    Element.Methods[m] = Element.Methods[m].wrap(
      function(proceed, element) {
        rememberChange(element, m);
        scheduleEvent();
        return proceed.apply(null, $A(arguments).slice(1)); 
      });
  });
})();

When an element has been removed from the DOM, it is pointless to fire an event on it that bubbles upwards. There’s no surface to bubble up to anymore. Therefore, in this case, the dom:changed event is fired on the parent of the removed element and the operation is signified as removeChild.

To peek at the modification events, or do something useful with them, add code like this

document.observe('dom:loaded', function() {
  document.body.observe('dom:changed', function(event) {
    console.log('dom:changed: ', event.element(), event.memo.operation);
  });
});

JavaScript FSM v0.2.2

I’ve released a new version, 0.2.2, of the JavaScript FSM builder. There are some enhancements, such as accessors for successorStates and expectedEvents that I found useful for implementing a first (almost) practical example involving drag & drop.

Speaking of which, this whole thing didn’t come into being because of a pressing need. Currently, it’s more of a solution looking for a problem. I know that state machines can be very helpful for UI construction, however, this particular incarnation still has to prove itself.

All the rest

Finite State Machines in JavaScript

I like finite state machines and I wanted to try metaprogramming in JavaScript ever since I’d seen Adam McCrea presentation on the topic.

The result is an FSM builder in JavaScript. Machine descriptions look like my test machine here:

var Machine = FSM.build(function(fsm) { with (fsm) {
  onUnexpectedEvent(function() { ... });

  state('start', 'initial')
    .event('go')
      .goesTo('middle')
      .doing(function() { ... })
      .doing('phew')
    .event('run')
      .goesTo('finish')
    .onExiting(function() { ... });

  state('middle')
    .onUnexpectedEvent(function() { ... })
    .onEntering(function() { ... })
    .event('back')
      .goesTo('start')
      .onlyIf(function() { return true_or_false })
    .event('go')
      .goesTo('finish');

  state('finish', 'final');
}});

function TestMachine() {}
// amend TestMachine.prototype here all the way you want
TestMachine.prototype.phew = function() { ... };
TestMachine.prototype = new Machine(TestMachine.prototype);

There’s no documentation yet, but thorough unit testsspecs
using Nicolás Sanguinetti’s very nice js-spec framework.

Something to look at:

The script is meant to be usable independently of and play nicely with any other libraries.

The manner in which an FSM is attached to classes/objects is still rather convoluted. The general idea is that it (a) should be possible to insert the FSM as the first link in the prototype chain and (b) should be possible to directly attach it to an existing object. I’d appreciate suggestions how to make this nice and shiny.

Looking good at any (font and window) size

Make your layout look good a different screen and font sizes.

What it looks like

Example 1,
Example 2.

Here’s what the form example (example 1) is supposed to look like.

At 1024 x 768 pixels, the navigation links and Save button are positioned fixed in a column to the left.

large layout

At 800 x 600 pixels, the navigation links are only shown on hover over the icon in the top-left corner; the Save button is tucked under the form itself.

large layout
large layout

What you need

Grab layout.js.

You also need Prototype.js.

What you need to do

Include the scripts in your page.

<script src="javascripts/prototype.js" type="text/javascript"></script>
<script src="javascripts/layout.js" type="text/javascript"></script>

Activate layout switching in the head of your page

<script type="text/javascript">
//<![CDATA[
Event.observe(window, 'load', function() {
  Layout.initialize({observeFontSize: true});
});
//]]>
</script>

Most likely, the default size thresholds set in layout.js won’t fit your needs. See the file itself for how to set them to different values.

(Re-)Write your stylesheets so that they make use of the size information. As an example, here’s the CSS I use for styling the navigation list on the two example pages.

#navitrigger {
  display: none;
}

#navigation {
  position: fixed;
  top: 0em;
  left: 0em;
  margin: 1em;
  padding: 0;
  text-align: right;
  z-index: 10;
}

#navigation ul {
  width: 10em;
  margin: 0;
  padding: 0;
  list-style-type: none;
}

#navigation li {
  font-weight: bold;
}

#navigation .current {
  display: block;
  width: 100%;
  color: #bbb;
  background-color: #ffecac;
}

#navigation li.admin {
  border-top: 1px solid #bbb;
}

#navigation li a {
  display: block;
  width: 100%;
}


body.small #navigation {
  position: absolute;
  text-align: left;
  z-index: 30;
}

body.small #navigation ul {
  display: none;
  background: #fff;
  border: 1px solid #888;
}

body.small #navitrigger {
  display: block;
  font-size: 150%;
  font-weight: bold;
}

body.small #navigation:hover ul {
  display: block;
}

Return of the Tag Cloud — ajaxing the tagged

On my continuing quest to become more Web-2.0-ish, I’ve tried my luck tilting at… well, tag clouds. To get an idea what I’m talking about, please have a look.

These are the rudimentary basics to create a tag cloud like that.

In the controller

def tags
  @popular_tags = Tag.find_most_popular(:limit => 30)
end

In the view

<ul id="tags" class="tagcloud">
<% @popular_tags.sort_by(&:name).each do |t| -%>
  <%= weighted_tag t, tag_options %>
<% end -%>
</ul>

or, to get a somewhat nicer look, and to demonstrate some of the options

<%
  tag_options = {
    :wrap => ['li', '<span class="dlm">[</span>', '<span class="dlm">]</span>'],
    :min_size => 100, :max_size => 500,
    :link_options => { :class => 'tag' })
  }
-%>
<h2>Tags</h2>
<ul id="tags" class="tagcloud">
<% @popular_tags.sort_by(&:name).each do |t| -%>
  <%= weighted_tag t, tag_options %>
<% end -%>
</ul>

Here you can download a do-it-yourself kit of all the pieces.

Auto-completion for tag lists

See the end of this post for an important update.

Standard Rails auto-completion is geared toward completing a single value entered in a text field. For most cases this is exactly what’s needed, but there is one prominent case that is different: auto-completion of tags. If something can have a tag at all, it’s part and parcel of the deal that it can have multiple tags.

As far as I can tell, some configuration tweak is not enough to make standard auto-completion do our bidding. But not all is lost. It’s just a small matter of programming to get what we want.

I’m assuming that you’re using Acts As Taggable or Acts As Taggable On Steroids for the model-level tagging, or otherwise that you know what you’re doing.

First, we need client-side support for picking out only the tag we’re currently editing.

Ajax.TagAutocompleter = Class.create();
Object.extend(Object.extend(Ajax.TagAutocompleter.prototype, Ajax.Autocompleter.prototype), {
  getToken: function() {
    var range = this.rangeForCaret();
    var value = this.element.value.substring(range.start, range.end);
    return value;
  },
  updateElement: function(selectedElement) {
    var oldValue = this.element.value;
    var range = this.rangeForCaret();
    var prefix = oldValue.substring(0, range.start);
    var suffix = oldValue.substring(range.end);
    var value = Element.collectTextNodesIgnoreClass(selectedElement, 'informal');
    this.element.value = prefix + value + suffix;
    this.element.focus();
  },
  rangeForCaret: function() {
    var value = this.element.value;
    var start = 0, end = value.length;
    var pos;
    if (typeof this.element.selectionStart != 'undefined') {
      pos = this.element.selectionStart;
    } else if (document.selection) {
      var sel = document.selection.createRange();
      var selLength = sel.text.length;
      sel.moveStart('character', -(value.length));
      pos = sel.text.length - selLength;
    }
    if (pos != undefined) {
      end = pos;
      while (value.charAt(end) != ',' && end < value.length) {
        end++;
      }
      start = end - 1;
      while (value.charAt(start) != ',' && start > 0) {
        start--;
      }
      while (start < end && (value.charAt(start) == ' ' || value.charAt(start) == ',')) {
        start++;
      }
      while (start < end && value.charAt(end) == ' ') {
        end--;
      }
    }
    return {start: start, end: end};
  }
});

Yes, the code of rangeForCaret is a bit convoluted, let’s say traditional JavaScript-style. The general approach for getting the position of the text cursor (“caret”) is explained here. The purpose of all the stuff is to support auto-completion in the middle of the text field, not just at its end.

On the server-side, in the relevant controller, there’s still some work to do as the standard auto_complete_for can’t handle tags. Put the following method in your controller base class, app/controllers/application.rb.

def self.tag_auto_complete_for(object)
  define_method("auto_complete_for_#{object}_tag_list") do
    @items = Tag.find(:all,
      :conditions => [ 'LOWER(name) LIKE ?', '%' + params[object][:tag_list].downcase + '%' ], 
      :\order => 'name ASC',
      :limit => 10)
    render :inline => "<%= auto_complete_result @items, :name %>"
  end
end

Then, in an individual controller, create the tag auto-completion method like this

class PeopleController < ApplicationController
  tag_auto_complete_for :person
end

Almost done!

What’s still missing is a way to activate auto-completion for the tag input field. It would surely be possible to copy & change text_field_with_auto_complete or to monkey patch it appropriately. I prefer another way, in fact, I’m not using text_field_with_auto_complete at all, not even where it would work. Instead, I prefer more unobtrusive way.

The way starts with the class autocomplete to text fields that are amenable to auto-completion — including, of course, the tag list field.

  <%= f.text_field :tag_list, :class => 'autocomplete' %>

As this in itself is completely inert, we need to nudge it a bit in application.js. Here’s a function that looks for all text fields with class autocomplete and actually makes them do what they say.

function installAutocompletion() {
  $$('input.autocomplete[type=text]').each(function(element) {
    var fieldId = element.id;
    var completions = document.createElement('div');
    completions.id = fieldId + '_auto_complete';
    completions.className = 'auto_complete';
    completions.style.display = 'none';
    element.parentNode.insertBefore(completions, element.nextSibling);

    var url = 'auto_complete_for_' + fieldId;
    if (/_tag_list$/.test(fieldId)) {
      new Ajax.TagAutocompleter(element, completions, url);
    } else {
      new Ajax.Autocompleter(element, completions, url);
    }
  });
}

Be sure to call this method some time after the page is loaded. If you don’t have a function from where to call it, add this to application.js

  Event.observe(window, 'load', installAutocompletion);

Update, 2007-02-05

I may not have seen the wood for the trees when looking at the original code of the Rails/Script.aculo.us autocompleter. Of course it is fully capable of auto-completing more than one token in the same text field — with a very little configuration tweak, no less.

What it can’t do is auto-completion in the middle of the line; it only works at the end. That’s an acceptable restriction, to my mind. So, forget about Ajax.TagAutocompleter from above and instead install your autocompleters like this

function installAutocompletion() {
  $$('input.autocomplete[type=text]').each(function(element) {
    var fieldId = element.id;
    var completions = document.createElement('div');
    completions.id = fieldId + '_auto_complete';
    completions.className = 'auto_complete';
    completions.style.display = 'none';
    element.parentNode.insertBefore(completions, element.nextSibling);

    var url = 'auto_complete_for_' + fieldId;
    var options = {};
    if (/_tag_list$/.test(fieldId)) {
      options.tokens = ',';
    }
    new Ajax.Autocompleter(element, completions, url, options);
  });
}

Rails: Almost Automatic Client-Side Validation

Ruby on Rails already does a good job of specifying almost declaratively what conditions objects must meet to be considered valid–that is, how they are validated.

Thus, in order to make sure that a Person’s last_name attribute does not exceed 100 characters, you would write something like this

class Person < ActiveRecord::Base
  validates_length_of :last_name, :maximum => 100
end

Somewhere in a view you’ll probably refer to the last_name attribute like this

<% form_for :person, @person, :url => { :action => "update" } do |f| -%>
  Last name : <%= f.text_field :last_name %>
  <%= submit_tag %>
<% end -%>

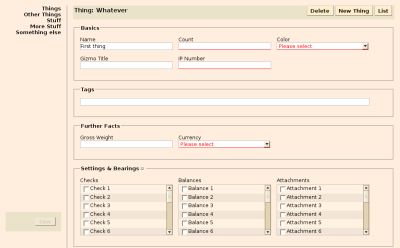
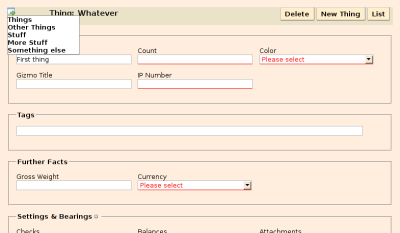
There you get a nice form where users can enter last names as long as they may wish–only to be shown an error message complaining about the length in cases where they have unwittingly overshot the limit. How should they have known?

Well, as a nice and caring person you could add an annotation to each input field saying how long its contents are allowed to be. That would be slightly better, but still leaves more work for the users than necessary.

How about this: Users are immediately notified in an unobtrusive way that some of the content they have (or have not yet) filled into a form does not constitute valid data. Furthermore, users are kept from submitting a form that contains obviously invalid data.

Should be easy, shouldn’t it? Yes, it should and actually it is just two plugins away.

Raising awareness of validations

Out of the box, Rails handles validations in such a way that it adds callbacks for checking them to model classes, but otherwise immediately loses awareness of them. When later on in the lifecycle of a model instance validations are checked, Rails does so on autopilot. A model class just does it’s thing, it won’t tell you what it’s doing, but you can be sure it’ll complain when something is wrong. Let’s add some reflection to make model classes a bit more loquacious. The details are irrelevant, just install the Validation Reflection plugin into your Rails application

$ script/plugin install svn://rubyforge.org//var/svn/valirefl/validation_reflection/trunk

Tell the browser

So far, the newfound awareness of validations idles away on the server-side. Somehow it has to be transported to the user’s browser. That is one of the things the Client-Side Validation plugin does. Install with

$ script/plugin install svn://rubyforge.org//var/svn/clientsidevali/client_side_validation/trunk

The first thing this plugin does is that it enhances tags generated by Rails’s helper methods in such a way that they contain encoded information about the validation constraints that apply to their values.

Engage the client

Still, even though validation information has been inserted into the HTML sent to the browser, where it lays dormant. On the client-side, JavaScript is where the action is. Therefore the task of checking validations there is handled by a validator written in JavaScript included with the Client-Side Validation plugin.

The generic script for the validator is included in your views or layout as part of the default scripts, therefore it is probably just there already.

<%= javascript_include_tag :defaults %>

Here we come to a point where you, the programmer, have to make some decisions and do some work. First, you need to decide (or have your code decide) what locale your users are in. Remember, dates don’t look the same all over the world.

 <%= javascript_include_tag 'validators-en' %>

Currently English (en) and German (de) are supported.

Then, you have to tell the validator that there’s work for it to do. For this, all forms that ought to be validated have to be marked with the class validated. Thus, the above form becomes

<% form_for :person, @person, :url => { :action => "update" }, :html => { :class => 'validated' } do |f| -%>
  Last name : <%= f.text_field :last_name %>
  <%= submit_tag %>
<% end -%>

Also, you need to nudge the validator to start looking at the forms by adding a line to public/javascripts/application.js

Form.Validator.installForAllValidatedForms();

You ain’t see nothing yet

If you’ve followed all these steps, the validator is probably doing its work, but hardly see anything of it. You may notice that the submit button is enabled when the form is valid and disabled when it is invalid, but that is all there is.

A further, but still invisible, thing that the validator does is that it adds (removes) the class “invalid” to input elements when they are invalid. Making this change in attribute visible is a small matter of CSS

 .invalid {
   border: 1px solid #f00;
 }

The result is not pretty, but you can push your stylesheeting abilities to the limit to make them look however you like. Also, the validator offers hooks for customizing most aspects. But that is left for a future installment.